Ungrounded three-prong outlets are a very common defect found on home inspections of old houses. Thankfully, repairing this issue is not a huge deal, and today, I’ll walk through the different repair options.
Disclaimer: this blog post gives an overview of how to repair an ungrounded three-prong outlet. This is not a DIY guide for handy homeowners. If you’re not qualified to do electrical work, don’t do it. You could get shocked, electrocuted, or start your house on fire.
To start off, the third prong on a plug is for the ground wire, and its job is to bond electrical components. Under normal conditions, there should never be any current on the ground wire. Think of it as an emergency lane on the highway; things will work just fine without it, but when something goes wrong, you better have it. If a three-prong outlet is installed with only two wires and no grounding path, we call it an ungrounded three-prong outlet. As I mentioned before, this is a common defect at old houses, and sometimes at newer homes where some hack has been messing with the wiring. An ungrounded three-prong outlet increases the potential for shocks or electrocution.
Any cheap electrical tester will identify an ungrounded three-prong outlet unless someone goes out of their way to fool the three-prong tester, which would be highly unethical and dangerous. I won’t explain how that’s done.
So, anyway, let’s return to repairing an ungrounded three-prong outlet. The electrical code provides several options for this repair, listed under section 406.4(D) of the 2014 National Electric Code (NEC).
Repair with a ground path
If a ground path exists, you need to use it. NEC Section 406.4(D)(1) says that a grounding path must be used if it exists. Ground paths have been required throughout homes since 1962. This means that the only acceptable repair for an ungrounded outlet in a home built after 1962 is to ground the outlet. If no ground path exists on a home this age, someone really screwed up.
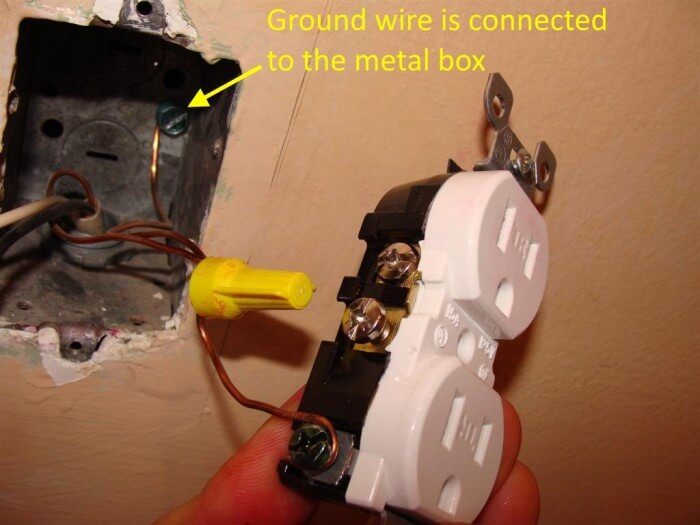
If the metal box is properly grounded, the most common way of grounding the outlet to the box is to simply connect a wire to the box, as shown below. This is called an equipment bonding jumper.
There are other methods listed under section 250.146 of the NEC, but I’m not going to try explaining those.
If no ground path exists, there are three options for replacing the outlet, given under NEC section 406.4(D)(2)(a), 406.4(D)(2)(b), and 406.4(D)(2)(c).
1. Install a two-prong outlet. While this is allowable, I personally think this is a terrible option. If someone wants to use a device with a three-prong plug, they’ll simply use a three-prong adapter, which is not safe. Three-prong adapters are only supposed to be used at properly grounded two-prong outlets. Additionally, two-prong outlets are not available in a tamper-resistant model, further decreasing the outlet’s safety.
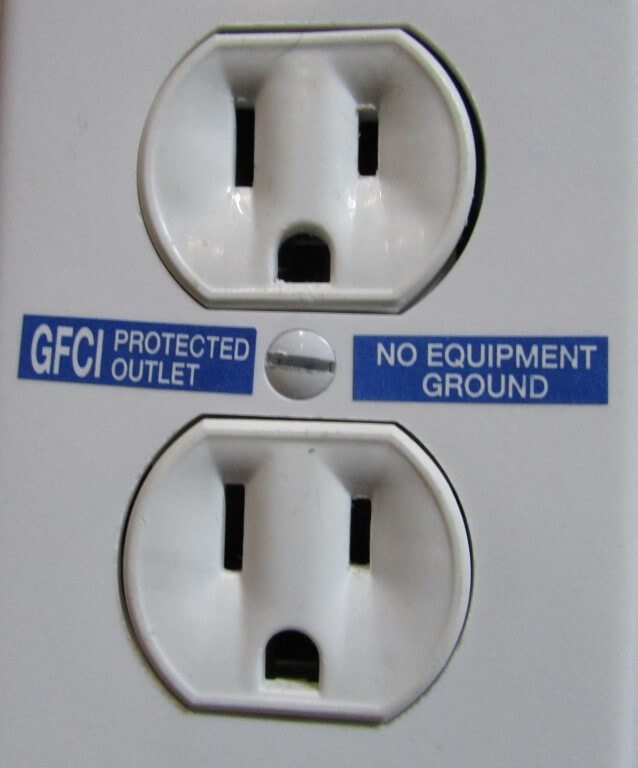
2. Install a GFCI outlet. A GFCI outlet will help to prevent electrocution, but it won’t help surge protectors do their job. If you do this, you need to add a sticker to the face of the GFCI outlet that says “No Equipment Ground”.
3. Add GFCI protection. GFCI protection can be installed at the breaker panel or somewhere between the breaker panel and the outlet. If you do this, you need to apply a sticker to the outlet that says “GFCI Protected” and “No Equipment Ground”. That’s why GFCI outlets come with a bunch of these labels.
And now to make it complicated
The part that makes all of this a bit more complicated is that as of January 1st, 2014, most replacement outlets in homes need to have AFCI protection. If the main electric panel in the home is too old to allow for the installation of AFCI circuit breakers, it gets really interesting. It’s stuff like this that makes me really glad to be a home inspector; I say “have an electrican fix it”. I don’t have to design the exact repairs.


