I’ve gone through numerous digital cameras and I’ve become quite opinionated about what features a home inspector should look for in a camera. I recently sent an email to one of the newest inspectors on my team, giving some camera buying advice. Once I was done with that email, I realized it would make for a good blog topic as well. Even if you’re not a home inspector, some of this advice might be helpful.
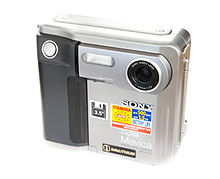
Side note: digital cameras have made life a lot easier. Back when I started with Structure Tech in 1997, my dad and Duane would take photos during their inspections and then drop off film to the office at the end of the day or early the next morning. A local photo shop would pick up film from our office in the morning and drop off developed photos in the afternoon. I’d glue the photos onto sheets of paper, enclose them in clear protective plastic, and include them in a binder with our inspection report, which I’d mail at the end of each day. The Sony Digital Mavica changed all that at the end of 1997. They were $500 and the high-res setting took photos at measely 640×480 pixels and stored them on a floppy disk, but we couldn’t get our hands on them fast enough. They saved us a ton of time and money.
Ergonomics
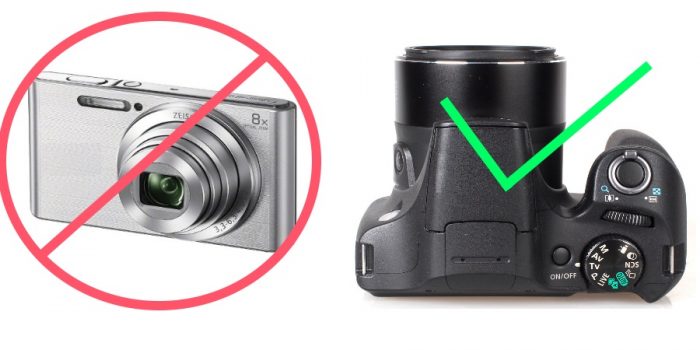
I recommend using a mid-sized camera that feels good in your hand. The opposite of an ergonomic camera is any camera shaped like a bar of soap that easily slips out of your hand. This camera will be easy to drop, and you’ll drop it and break it. I know that many home inspectors prefer small cameras like this because the camera will easily slip into a front shirt pocket, but too bad. I’ll take ergonomics over size any time.
Oh, and think about cold weather and gloves if you’re in a cold climate. Using a tiny camera is especially frustrating while wearing warm gloves. A larger camera with a big button is easy manageable.
Zoom
The more the better. This surely goes without saying, but optical zoom is the only thing that should be considered. I’ve been using a camera with a 30x zoom for the past eighteen months, and I can’t see myself going back to anything with a lesser zoom. I used to use binoculars to inspect chimneys and roof coverings that I couldn’t safely access with a 28′ extension ladder, but now I simply look at the zoom on my camera and take numerous photos from the ground to review on a computer screen later at home.
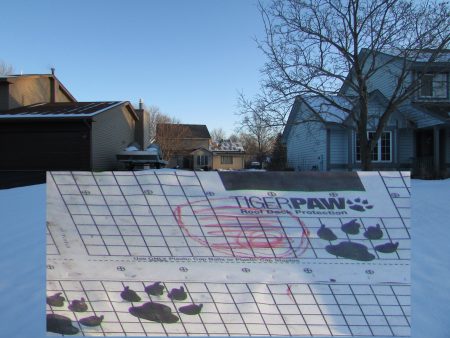
Check out the photo below, taken with a 30x zoom; I was experimenting with my last camera shortly after I purchased it last winter, and I took photos of a house across the block that was having a new roof covering installed. Once I got home, I happened to notice that the installation instructions on the underlayment weren’t being followed. The instructions said “Use ONLY Plastic Cap Nails or Plastic Cap Staples”. Looks like someone was using regular staples, yes? This wasn’t the house I was inspecting so it was none of my business, but I thought it was pretty crazy to be able to identify the wrong fasteners from the next block over. Click on the photo to see a larger version.
Flash
I wish there was some spec to compare that would tell me how well a camera could light up the far side of an attic while taking a photo, but there’s no such thing… at least not that I’ve been able to find. The best way I’ve found to determine how well a flash will light things up is to simply look at the size of the flash. The larger the flash, the more light.
The flashes that are always exposed are typically the smallest. Pop-up flashes always seem to put out more light, so look for a pop-up flash. I don’t like spring activated flashes, and especially not motor-activated flashes. Those are just two more things that can fail, and I’ve had both fail. The best flashes are the pop-up types that are manually operated. You simply set your camera to always flash when the flash is open, which makes it very easy to control when the flash goes off and when it doesn’t. It just takes a quick flick of your finger to open or close the flash, and this can easily be done with big gloves on.
Macro
 As far as I know, all cameras have a “macro” setting, which is what is used for taking close-up photos. This is what the universal flower button on cameras is for. Some cameras have a manual macro setting and some are automatic, but every camera I’ve ever owned has had this setting. What home inspectors need is the ability to use the macro setting in conjunction with the flash on their camera. Some cameras do an excellent job of this, while other cameras completely white-wash everything with the flash, rendering the photo useless.
I regularly use the flash along with the macro setting when taking pictures of data plates on appliances, and while taking photos of the insides of electrical panels. When I find carpenter ants, I take close-up photos of them too, simply to document their presence.

To figure out if a camera will do a good job of this, you need to play around with it in a store. Try holding the camera about 6″ away from something with small print and take several photos while using the macro setting and the flash. If any of the photos turn out white-washed, keep looking for a different camera. Many years ago I owned a Sony DSC-H20, which was the best camera I’ve ever used for taking great close-up photos every time. When that camera broke and was no longer made, the next closest camera that I could find was a Sony DSC-H90, but the macro-shots were inferior. Nothing I’ve used since has been quite as good, but I’ve had decent results with a Canon SX170 and a Canon SX400. All of these cameras have been in the $150 – $200 price range.
While you’re at it, test out the zoom feature in the store. Some cameras don’t focus properly when zoomed. Some do.
Warranty
While many home inspectors like to purchase “tough” or “indestructible” cameras, I recommend simply purchasing an accidental damage warranty plan. Rugged cameras are too expensive, the zoom sucks, and the quality is compromised too much to justify using them. With an accidental damage plan, you can get your camera repaired or replaced for free, or for a small deductible. Best Buy has offered this for a long time, but accidental damage plans are also offered by SquareTrade and a relatively new warranty company here in Minnesota called Upsie. I haven’t tried Upsie yet, but I had a positive experience with a dropped laptop that was warrantied by SquareTrade. They simply mailed a check to cover the cost of the laptop.


Jack Feldmann
August 9, 2016, 10:16 am
Reuben,
My experience with Square Trade was mixed. I bought a 3 year warranty on a camera, and had to send it in for repair. It wasn’t a month, and it broke again. When I contacted Square Trade to send it in again, they told me I didn’t have enough credit left for a repair. The warranty has a ceiling of the cost of the camera, and they control the costs of the repair. My lens/zoom repair used up about 85% of the cost of the camera.
While I love my Panasonic Lumix for the zoom, they are horrible in dusty conditions such as attics and crawlspaces. The zoom mechanism seems to be a weak link with Lumix cameras. Dust also gets inside and will leave a spot on the inside of the camera.
I use inexpensive waterproof cameras (only 5X zoom) for attics and crawlspaces, and switch out SD cards with my other camera. I prefer the smaller camera. I don’t really want to haul around a large camera with me.
Reuben Saltzman
August 9, 2016, 10:18 am
That’s good info to be aware of with SquareTrade. Thank you for sharing!
Rick Koehler
August 10, 2016, 5:11 am
I use a Cannon SX720HX. It has A 40X ZOOM. I high recommend it.
Paul DeFalco
August 11, 2016, 10:29 am
If anyone knows of a camera that can take pics with a voice memo along side of it somehow that would be the ultimate for me. I’ve searched high and low for this but to no avail.
Steven Hong
October 18, 2016, 1:22 pm
Reuben-
The standard measure for how bright a flash can be is called the Guide Number, or GN. But on these point and shoot cameras, the manufacturers usually don’t publish that spec. Instead they publish “flash distance” which is something that can’t be compared between different cameras.
Reuben Saltzman
October 18, 2016, 1:27 pm
Aha! So there is a standard… but it just doesn’t help me much 🙂
Thank you for the tip!