LP SmartSide® is the new high-end siding of choice here in Minnesota. It used to be stucco, but moisture intrusion problems with stucco siding made many high-end home builders start using James Hardie siding. In the last few years, this his changed. Today, I rarely see James Hardie siding used on new homes any more; builders are using LP SmartSide® instead.
For a head-to-head comparison, click on the following link for an in-depth discussion of James Hardie siding vs. LP Smartside, which Ryan Carey posted on this blog over a year ago.
LP SmartSide® is a great product that I have yet to find a single failure on, but I suspect I’ll be seeing failures soon enough, because I find installation errors on nearly every home I inspect. If you install LP SmartSide®, don’t make these mistakes. If you’re buying a home with LP SmartSide® or you’re having it put on your own house, watch out for these mistakes. If you’re a home inspector… well, you see where I’m going with this. Check this stuff. These are the most common mistakes being made by installers today.
Missing Paint
Without a doubt, the most common installation error that I find with LP SmartSide® is missing paint at the cut edges. The manufacturer requires all exposed surfaces to be primed and painted.


Overdriven Nails
This is another common defect. Here’s a small collage of overdriven nails.

The diagram below shows the appropriate repair methods for overdriven nails.

Insufficient Clearance
The manufacturer requires 6″ of clearance from the siding to the finished grade. It seems that almost every home has one or two areas where this clearance requirement isn’t met.

The manufacturer also requires 1″ clearance to shingles. This is usually done right, but not always.

The manufacturer requires a 3/8″ gap above windows and other similar penetrations.

This is rarely done.

A 3/8″ gap is a BIG gap. Even when a gap is left here, it’s usually not what the manufacturer requires.

Improper butt joints
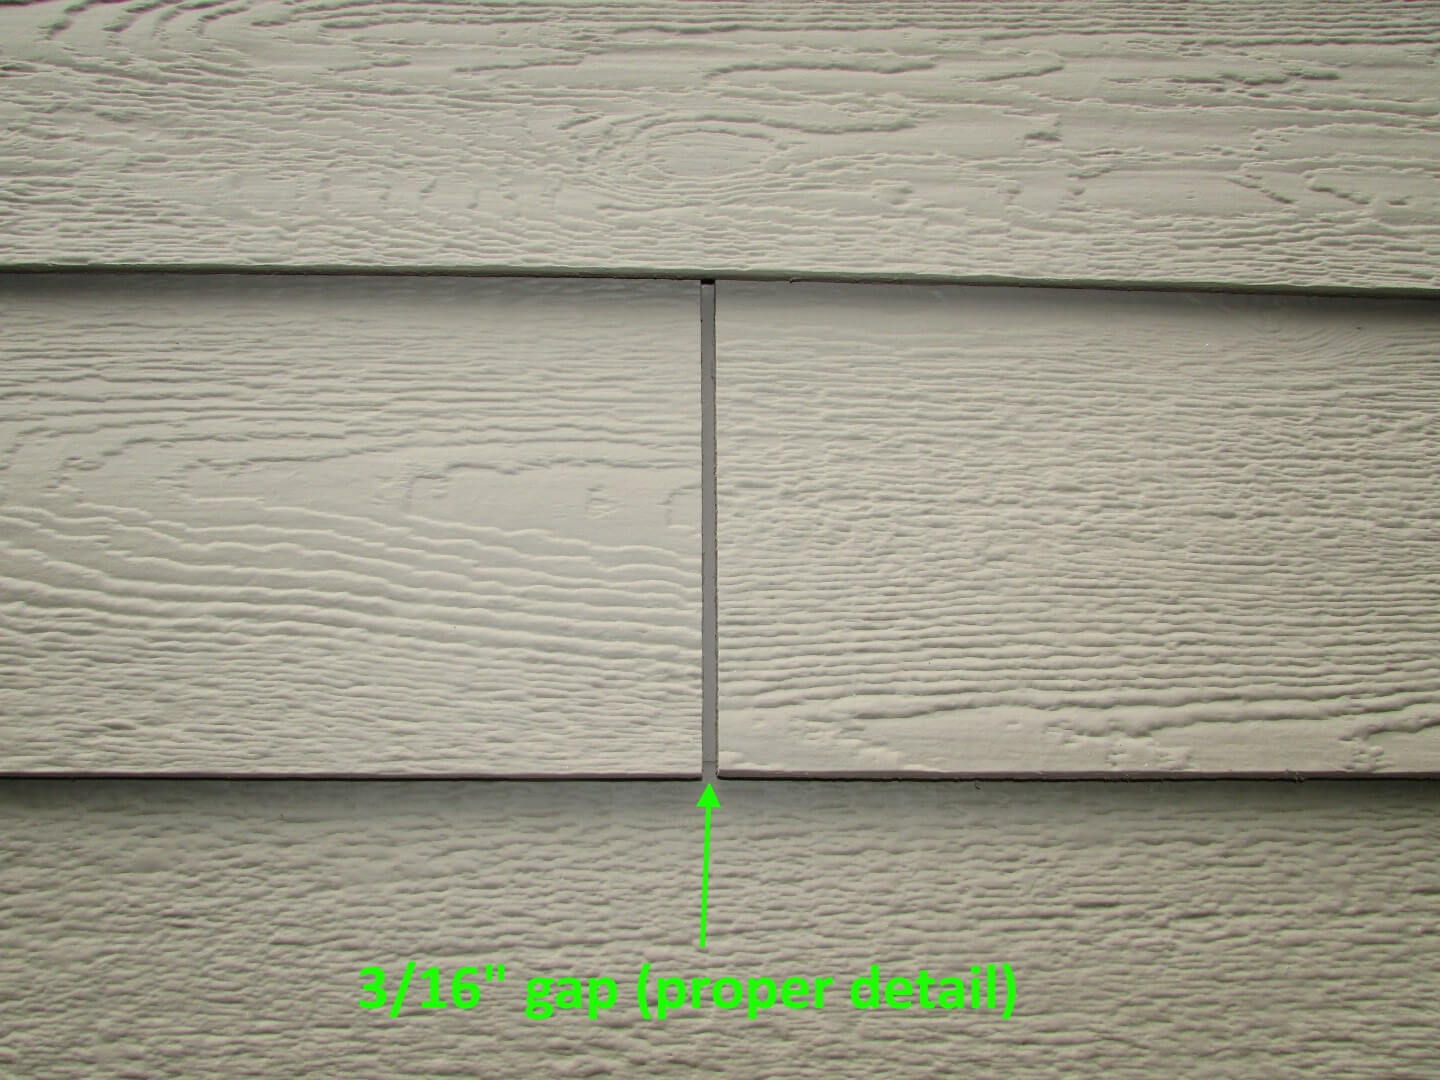
The manufacturer requires a 3/16″ gap at the end of each piece of siding. This includes butt joints, and places where the siding terminates vertically against windows, doors, and other fixtures.


A 3/16″ gap is a pretty large gap. Here’s what a proper 3/16″ gap looks like:
Insufficient kickout flashing
Kickout flashing is a piece of metal at a roof end that prevents water from leaking into the wall. See below.

LP SmartSide® requires flashing to have a 4″ upper leg. This means the kickout flashing needs to be 4″ high. This usually isn’t done.

Joint Treatments
There are three options for keeping water out of the butt joints. The first and second options are to have the joints caulked or have joint molding installed.
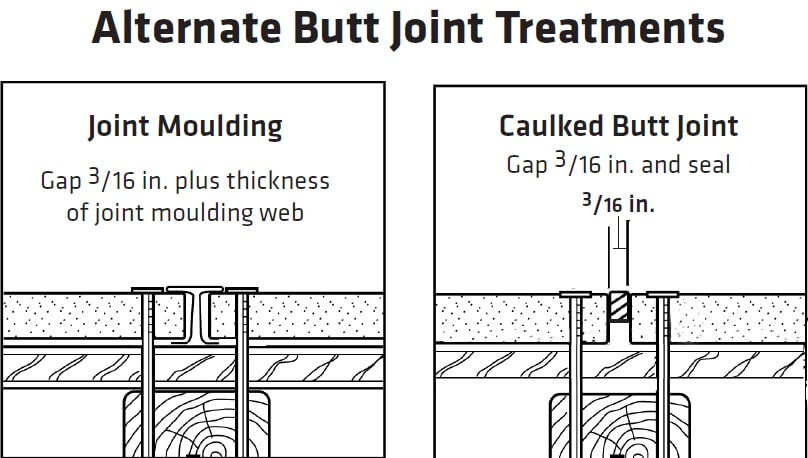
The third option is to have flashing at least 4″ wide installed at the joints, as long as the ends of the siding are factory finished, and the siding is prefinished by an approved or preferred prefinisher. That means no cut edges at the butt joints. When field-cut edges are present, flashing at the joints is not an appropriate installation method.
Conclusion
That wraps up my list of the most common installation defects for LP SmartSide®. Again, this is not a full list of defects. For the full list of installation instructions, and for more information on this product, click here. Why does this stuff matter? Because if the product fails as a result of an improper installation, the manufacturer will not cover repairs.
Related Posts:
- James Hardie Siding vs. LP Smartside
- Problems with James Hardie Siding Installations (includes installation instructions going back to 1998)
- Stucco Repairs in Minnesota (3 part series)
- Moisture testing stucco homes
- New Construction Inspections (multiple posts on this topic)
Author: Reuben Saltzman, Structure Tech Home Inspections
![]()
![]()
![]()
![]()
![]()
![]()
Nick Zeman
October 7, 2015, 12:08 pm
You sure know your LP. You nailed all of the same things that I also see as a contractor in the field. The biggest problem with most things is not the product, but how it’s installed. Keep up the great work Structure Tech! Love reading these articles.
Reuben Saltzman
October 7, 2015, 1:47 pm
Thanks Nick!
Ryan Bretzel
October 7, 2015, 12:32 pm
Can you caulk the butt joint rather than leave exposed and painted?
Reuben Saltzman
October 7, 2015, 1:48 pm
Yes, the joints can be caulked.
Paul B.
October 17, 2015, 4:02 am
we are ready to install on new house for first time. Sent your article to my lead carpenter. All good points.
Thanks,
Paul
Photos from New Construction Home Inspections, Part V | Structure Tech Home Inspections
November 10, 2015, 6:41 am
[…] recently wrote an entire blog post on installation defects with LP Smartside, which I won’t repeat here. All of those installation defects were from new homes. […]