If you see black stuff covering or growing on the roof sheathing in your attic, it’s probably mold. It’s never fun to find out that your house has mold, but the fix for mold in the attic is usually quite straightforward, and doesn’t involve the services of any ‘mold remediation experts’.
What causes mold in an attic
When mold grows in an attic, it’s caused by a moisture problem. Period. Some moisture sources are obvious and have a huge impact – bathroom exhaust fans, kitchen exhaust fans, clothes dryers… they all pump moisture out of the house, and they should never be vented in to the attic. Everyone knows that, right?
The less obvious moisture sources are attic bypasses; air leaks that allow relatively warm, moist air from the house to get in to the attic. To reduce the amount of moisture getting in to an attic, the attic air leaks need to be sealed off. Covering these air leaks with traditional insulation doesn’t stop the air movement; there needs to be some type of air barrier installed, such as foam insulation or caulk. These attic bypasses show up quite clearly with an infrared camera, but any well-trained insulation contractor will already know exactly where to look for these.
Photos of Attic Bypasses / Attic Air Leaks
I’ve accumulated about a bazillion photos of attic bypasses over the years, so included below are a few of the most common places you’ll find attic bypasses in just about every Minnesota house built before 1991. In all of the photos below, I’ve pulled the insulation away to reveal the bypasses; you won’t find any of these in your attic without moving insulation around. For the record, home inspection standards of practice don’t require the home inspector to move insulation… so don’t be surprised if your home inspector didn’t mention any of this stuff.
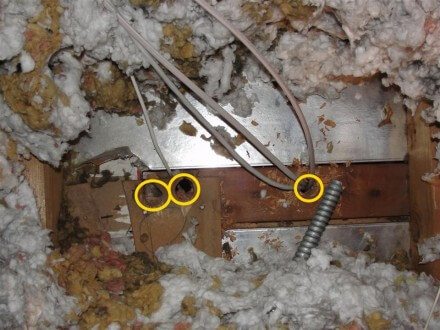
Any time small cables or wires pass through the top plates of walls in to the attic, the holes for the wires should be sealed up. When they’re not sealed, they leak air. Do you see how some of the insulation in the photo below has been darkened? It’s not mold. This is the result of years and years of air leaking through the insulation; the insulation acts like a filter, and traps all the dust in the air, turning it black. Even though these tiny holes don’t seem like a big deal, having them all over your attic can have a huge effect. Sealing these gaps can be easily accomplished with a can of foam insulation.
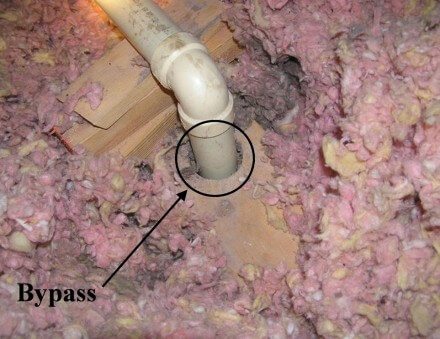
Larger penetrations in to the attic, such as plumbing vents, also need to be sealed. Again, foam in a can works well.
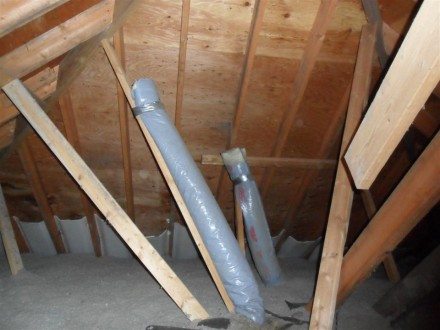
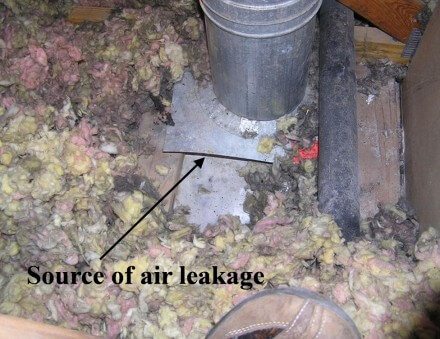
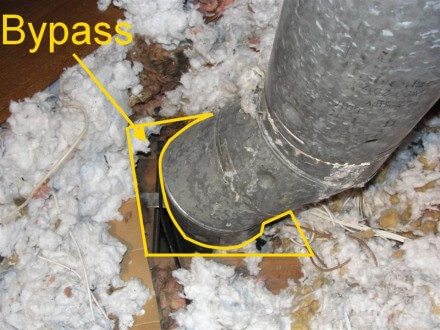
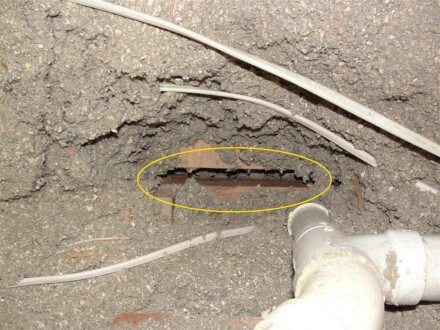
The first place I always check for attic air leaks is around the furnace vent; if there is air leaking into the attic around this chaseway, there will surely be air leaking everywhere else. In the photo below, the darkened insulation is a dead giveaway that there is a lot of air leaking through here. Foam insulation wouldn’t be an appropriate repair for this location, as the vent is supposed to have at least one inch of clearance to anything combustible. In the photo below, installing a small block of wood to fill the gap at the bottom (maintaining a one inch clearance to the vent) and then sealing the entire assembly with high-temperature caulk would be a good fix.
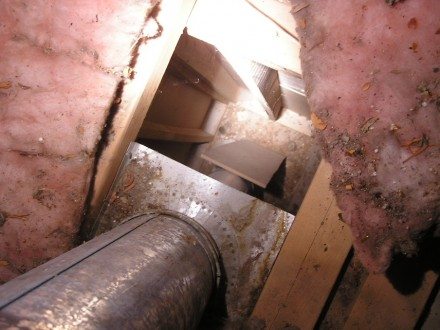
Here’s another furnace vent – this one is completely missing the sheet-metal collar. I could see right down into the walls after pulling the insulation away. This is very common.
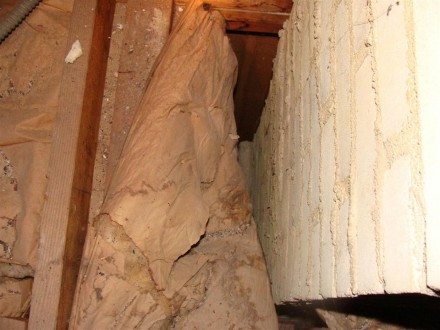
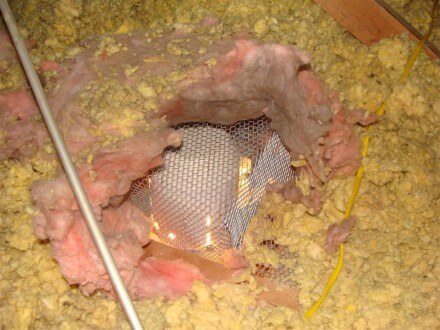
Here’s a huge bypass around a furnace vent; the chaseway that leads down to the basement was large enough for a person to fit through, and it was basically wide open at the attic; they just had a piece of fiberglass insulation covering the top. You can clearly see the basement ceiling from inside the attic.
The space around masonry chimneys will often be a source of air leakage. If the chimney is being used for a wood burning fireplace, there needs to be a two-inch gap to combustible materials. Sealing these air leaks will require the use of high temperature caulk and sheet metal.
As I mentioned in my blog about evil recessed lights, they can be a huge source of attic air leakage. Notice all the light pouring through this fixture; the light equates to a lot of air leakage.
When additions are put on, the transitions between the new and old portions of the house are often sources of air leakage.
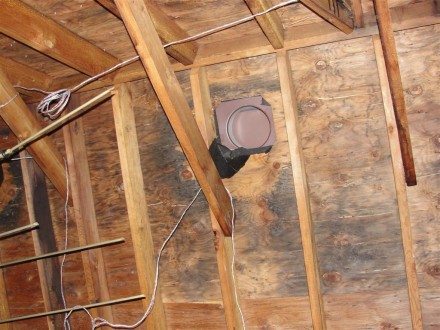
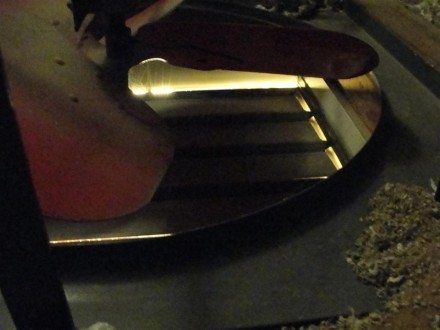
Whole-house attic fans can be a major source of air leakage into attics. These are fans that are designed to be run in the summer only. The photo below shows light leaking through the attic fan, which means a lot of air is leaking through as well.
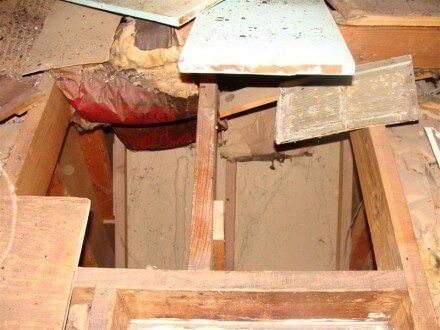
Probably the largest attic bypass that I commonly find is the one above the stairway to the basement on old ramblers. All of the wall cavities are wide open to this space, and nothing above it is sealed off. This is a bypass that’s large enough to fit a small family into. Other areas where ceilings drop down in older houses will be areas to look for bypasses – especially over bath tubs and kitchen soffits.
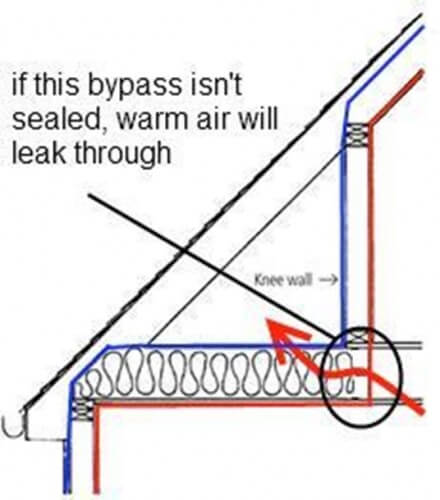
Finally, the space below the knee walls in old one-and-one-half story houses can be a major source of air leakage. The way to repair this is to have solid blocking installed underneath every joist cavity, and have it made completely airtight.
This is certainly not an all-inclusive list of the places to find attic air leaks, but it should be enough to help you understand what an attic bypass is. This is how air leaks into the attic. When all of these air leaks are perfectly sealed and a vapor barrier is properly installed in the attic, the attic interior will stay dry.
What if the air leaks can’t all be sealed? Sealing off all of the attic air leaks is nearly impossible to do without completely removing all of the existing insulation. I’ve actually recommended doing this many times, but before starting with such a drastic measure, it’s a good idea to check the obvious stuff in the house first. If the house is too humid, fix it. A large percentage of attic moisture problems are caused by whole house humidifiers. This fix for this situation is a no-brainer; turn the humidifier off.
Does adding more ventilation fix the problem? Attic ventilation is required by the building code, but it’s not a magic elixir. Air moving through an attic will help to remove moisture, but this isn’t the cure for a moldy attic. I’ve heard many people conclude that an attic mold or moisture problem was caused by lack of ventilation, but that’s a little like saying a hangover was caused by not taking enough Advil before going to bed. Adding more ventilation to an attic is just a way of dealing with the symptoms, and it doesn’t always work.
So what needs to be done about the existing mold? It depends on who you ask. If you talk to someone who has a financial interest in cleaning up the mold, they’ll tell you it needs remediation. If you ask someone who could get sued for not recommending professional remediation, odds are they’ll tell you to have professional remediation. Other people might argue that once the air leaks between the house and attic have been sealed off, it won’t matter what’s in the attic. As long as the roof sheathing isn’t rotted, I tend to agree.
For the record, sealing off attic bypasses is also one of the most effective ways of preventing ice dams and preventing frost accumulation in the attic. The Minnesota Department of Commerce has an excellent guide to finding and repairing attic bypasses, which gives more detailed information on how to find most of these bypasses and how to fix them.
Reuben Saltzman, Structure Tech Home Inspections – Email – Minnesota Home Inspector



north carolina radon
March 26, 2012, 9:52 am
Thanks for the information, I need to get into my attic, I found some mold on my bathroom wall so I have a bad feeling that I might have mold in my attic!
Frost in Attics | Structure Tech Home Inspections
December 18, 2013, 4:00 pm
[…] attic air leaks many times, and I’ve shared photos of attic air leaks; check out my post on moldy attics for some good examples of attic bypasses. Of course, any type of exhaust fan needs to be […]